Few years back, Microsoft has introduced a solution allowing Azure Joined device to use on-premises print services, named Hybrid Cloud Print.
This solution requires an on-premises print services infrastructure, but what about customer with no more on-premises footprint?
Well, good new, a new service called Universal Print is now available for cloud only customers (or even hybrid one if they do not want to use Hybrid Cloud or do not have anymore a print services infrastructure).
As this is a preview feature, you need to register your tenant by filling the form available here https://go.microsoft.com/fwlink/?linkid=2119908
Once your have been registered and accepted, you will receive an email with the instruction and an access code
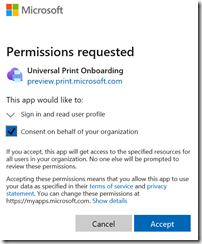
Connect to https://aka.ms/uppreview to grant permission to the Universal Print Onboarding Azure App the required permissions
RECOMMENDATION check the box Consent on behalf of your organization to avoid end users getting prompted the first time
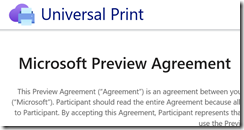
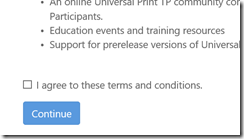
Then you need to read and accept the agreement
Finally you are requested to fill up the email address and the access code to get a promo code to active the Universal Print license and associate them with your tenant
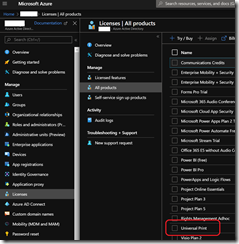
You can confirm you got the licenses by accessing your Azure AD portal (https://aad.portal.azure.com/) or Azure portal (https://portal.azure.com/) by accessing the Azure Active DirectoryLicensesAll products blade where you should see Universal Print
You can then assign the license to your users either manually or using the Group Based Licensing
Now, you have to download and install the Universal Print Connector from https://aka.ms/UPConnectorMSI; the device on which you are going to install the connector will need to be up and running 24/7
Requirements:
- Windows 10 Pro or Enterprise 1809 or later, or Windows Server 2016 or later
- .Net Framework 4.7.2 or later
- You must use either a global administrator or a Print Administrator (which a new administrative role) account
- Get licensed for Universal Print
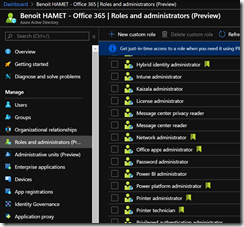
The Print Administrator role is available from your Azure AD (Roles and administrators blade); you will also notice a Print technician role to delegate printers registration and updates tasks
The Universal Connector installation process is very straight forward; just run the MSI package and accept the EULA
You can confirm the setup has been successful by checking the service Print Connector service is up and running
Once installed, launch the Print Connector application – either directly at the end of the installation or by using the shortcut in the Dekstop
You will asked to sign in to your tenant using a global or print administrator account (see above the prerequisites)
Once authenticated to your tenant, you will have to name your connector
Once registered, you can check your connector by accessing the Universal Print administration blade on Azure (https://aka.ms/UPPortal)
NOTE the Universal Print blades are not (yet) accessible from the Azure portal directly, you need to use the above URL
Using the PrintConnectApp you can then register your printers installed on the device; if don’t see any printer, that means either no printers are installed or not with their correct drivers, or because the installed printers are not local
You can use the below PowerShell command to check your printers and Type
Get-Printer
After you have fixed the issue, you can hit the Refresh Printers button and the printer should show up
Select the printer(s) you want to register with Universal Print and hit the Register button
You can confirm the registration has been completed successfully by accessing the Universal Print blade; this is also from there you can manage or unregister a printer
When managing a printer you can update the printer location, defaults (like media type [stationary or envelope], paper size…), or print jobs
Once you have your printer registered and you have set the various settings, you can share it to allow your
After sharing the printer you then have to define who can use it by accessing the Members blade
Finally you can instruct your end-user to install the printer by accessing the Windows SettingsDevicesPrinters & Scanners to add the shared printer
NOTE this will only work if the client device is registered to the same tenant (either Workplace, Azure AD or Hybrid joined)
All activities with Universal Print (install, printer registration, printer management…) are logged under the Microsoft-Windows-PrintConnector/Operational Windows event log
NOTE when you unregister a printer, it may still appear in the PrintConnectApp; you will have to delete the corresponding folder in C:WindowsPrintConnectorSvc. Every registered printers are listed here with the printer name and GUID in the folder name


![image_thumb[1] image_thumb[1]](https://www.cubesys.com.au/wp-content/uploads/2020/04/image_thumb1_thumb-139.png)
![image_thumb[2] image_thumb[2]](https://www.cubesys.com.au/wp-content/uploads/2020/04/image_thumb2_thumb-110.png)
![image_thumb[3] image_thumb[3]](https://www.cubesys.com.au/wp-content/uploads/2020/04/image_thumb3_thumb-88.png)
![image_thumb[5] image_thumb[5]](https://www.cubesys.com.au/wp-content/uploads/2020/04/image_thumb5_thumb-49.png)
![image_thumb[6] image_thumb[6]](https://www.cubesys.com.au/wp-content/uploads/2020/04/image_thumb6_thumb-38.png)
![image_thumb[7] image_thumb[7]](https://www.cubesys.com.au/wp-content/uploads/2020/04/image_thumb7_thumb-29.png)
![image_thumb[8] image_thumb[8]](https://www.cubesys.com.au/wp-content/uploads/2020/04/image_thumb8_thumb-23.png)
![image_thumb[9] image_thumb[9]](https://www.cubesys.com.au/wp-content/uploads/2020/04/image_thumb9_thumb-13.png)
![image_thumb[10] image_thumb[10]](https://www.cubesys.com.au/wp-content/uploads/2020/04/image_thumb10_thumb-11.png)
![image_thumb[12] image_thumb[12]](https://www.cubesys.com.au/wp-content/uploads/2020/04/image_thumb12_thumb-4.png)
![image_thumb[13] image_thumb[13]](https://www.cubesys.com.au/wp-content/uploads/2020/04/image_thumb13_thumb-3.png)
![image_thumb[16] image_thumb[16]](https://www.cubesys.com.au/wp-content/uploads/2020/04/image_thumb16_thumb-1.png)
![image_thumb[17] image_thumb[17]](https://www.cubesys.com.au/wp-content/uploads/2020/04/image_thumb17_thumb-1.png)
![image_thumb[18] image_thumb[18]](https://www.cubesys.com.au/wp-content/uploads/2020/04/image_thumb18_thumb-1.png)
![image_thumb[19] image_thumb[19]](https://www.cubesys.com.au/wp-content/uploads/2020/04/image_thumb19_thumb-1.png)
![image_thumb[21] image_thumb[21]](https://www.cubesys.com.au/wp-content/uploads/2020/04/image_thumb21_thumb-3.png)
![image_thumb[15] image_thumb[15]](https://www.cubesys.com.au/wp-content/uploads/2020/04/image_thumb15_thumb-1.png)
