By now, you already know Azure AD Connect, the directory synchronization tool from Microsoft to provision your identities in Azure Active Directory (AAD).
Well, a new version has been released (version 1.5.42.0) which allows you to export your configuration and then re use it when installing/configuring a new instance.
You may already know the Azure AD Connect Configuration Documenter (available here https://github.com/microsoft/AADConnectConfigDocumenter) which dump the complete Azure AD Connect configuration.
You also know that there can not be 2 active instance of Azure AD Connect but you can deploy additional instances in staging mode to provide a failsafe but you had to manually configured the new instances the exact same way as the production one – hence the Azure AD Connect Configuration Documenter assistance
Well, good new the latest version of Azure AD Connect now allows you to export your configuration in a JSON file and then use it to configure additional instances.
NOTE if you can not upgrade your production instance to take advantage of this new capability, install the the latest version on the new Azure AD Connect instance server and stop at the configuration wizard. Copy the MigrateSettings.PS1 PowerShell script (locate in C:Program FilesMicrosoft Azure Active Directory ConnectTools) to your Azure AD Connect production instance to run it and export the configuration. Then follow the steps below to import the configuration.
You can download the new version of Azure AD Connect here https://go.microsoft.com/fwlink/?LinkId=615771
NOTE this feature is in preview, meaning you can use it in production but there maybe some bugs or changes when the GA (general availability) will be released.
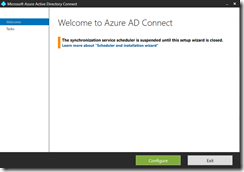
After installing (or upgrading) the new Azure AD Connect version, launch the Azure AD Connect configuration tool using either the shortcut on the Desktop or on the Start menu
Then click on Configure and choose View or export current configuration
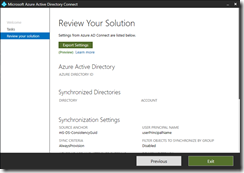
Then you have a review/summary of your configuration
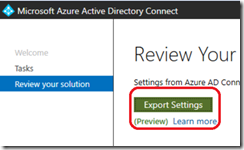
To export the configuration you have to click on Export Settings – this is not so obvious as usually this means more configuring the export – which then ask you where to save the JSON file (default will be C:ProgramDataAADConnect)
Now you have exported your configuration, you need to install a new instance (there is currently no option to import an exported configuration to an existing instance – this may come in a future release).
Once Azure AD Connect has been installed, launch the Azure AD Connect wizard (if not launched automatically the same way you launched it above to export the configuration).
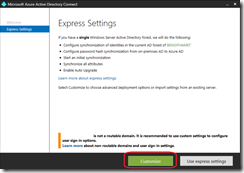
Choose the Customize option when configuring Azure AD Connect
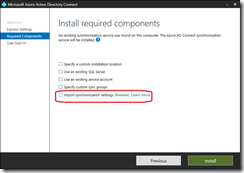
Then choose the Import synchronization settings to select the exported JSON file.
You can overwrite (if required) the SQL Server settings and/or service account as these settings are not exported – you may have to overwrite the service account anyway
And complete the install.
You will still go through the ‘normal’ configuration steps but with the selected option matching the exported configuration. Do not change the configuration if you do want to have weird behaviors when you will switch the production instance.
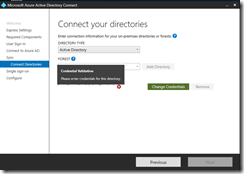
You will still have (obviously) to connect to your Azure AD instance and provide your on-premises credentials to complete the configuration because these credentials are not exported for security reasons.
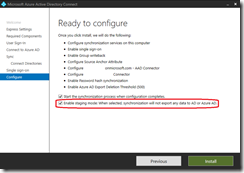
NOTE remember to keep the staging mode enabled
Once the installation and configuration is completed, you can review and compare the configuration between the production instance and the standby instance.


