As you know, Azure AD allows you and your end-users to invite external people to access resources and applications (the so called Guest) account but this required you had a Microsoft identity.
After allowing the use of one-time password authentication and guest access for Google account, you can now extend guest access to any identity provider (Microsoft and Google of course as already supported, but also Facebook or any SAML/WS-Fed identity providers). This is already well known for customer using Azure B2C (Business to Consumer).
You can also enable a self-service user flow for external identities, allowing you to provide access to an application while you may not always know in advance who will need to access it. This can be quite useful for developer and/or ISP who want to provide an application using Azure AD authentication capabilities.
The self-service user flow allows you to define which application can be ‘self-accessed’ without having to send an individual invitation.
External Identity Providers
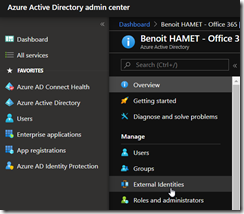
You can enable and configure external identity providers for your Azure AD, open your Azure AD portal (https://aad.portal.azure.com/) or Azure portal (https://portal.azure.com) and reach the Azure Active DirectoryExternal Identities blade
From there access the All Identity Providers to configure Google, Facebook or any SAML/WS-Fed identity providers
This will allow you to invite external users (guest) to access resources/applications without further configuration from them.
Below some screenshot of the process after inviting the external user; the external user looks his mailbox for the invitation email and then follow the simple and easy process to access the resources/application you have invited him
Done, no additional steps required to access the resources you have been invited to access.
Self-Service Workflow
As explained above, for some application you may not know upfront who is going to access your application. So you can enable a self-service user workflow.
First you need to enable the capability by accessing your Azure AD, open your Azure AD portal (https://aad.portal.azure.com/) or Azure portal (https://portal.azure.com) and reach the Azure Active DirectoryUser Settings
Then access the External Users option to enable the Enable guest self-service sign up via user flows
Then you can go to the Azure Active DirectoryExternal IdentitiesUser Flow blade to create a new flow
When creating a new user flow, you define the identity providers available for this flow (see above), which user attributes you need (if not available from the identity provider, end-user will be asked to fill it)
You add additional user attribute using the Custom user attributes blade; this can be done either before or after creating the user flow – off course if done after the user flow creation you will need to update your flow to include the custom attributes
Once the flow is created, you can define the application(s) going to be available through the self-service by accessing the flow you have created and then Applications blade
If you want to remove an application, you can do it using the application contextual menu
Once you have associated an application with the user flow, you need to provide the URL of the application, probably from a public web site
Then end-user can use the Create one link to create a new account; end-user will see the option to use the provider you have configured in the External Identity Providers
Once the process is completed by the external end-user, you will see you are Azure AD a new account automatically created for this user


![image_thumb[1] image_thumb[1]](https://www.cubesys.com.au/wp-content/uploads/2020/05/image_thumb1_thumb-162.png)
![image_thumb[2] image_thumb[2]](https://www.cubesys.com.au/wp-content/uploads/2020/05/image_thumb2_thumb-127.png)
![image_thumb[3] image_thumb[3]](https://www.cubesys.com.au/wp-content/uploads/2020/05/image_thumb3_thumb-103.png)
![image_thumb[4] image_thumb[4]](https://www.cubesys.com.au/wp-content/uploads/2020/05/image_thumb4_thumb-81.png)
![image_thumb[5] image_thumb[5]](https://www.cubesys.com.au/wp-content/uploads/2020/05/image_thumb5_thumb-54.png)
![image_thumb[6] image_thumb[6]](https://www.cubesys.com.au/wp-content/uploads/2020/05/image_thumb6_thumb-42.png)
![image_thumb[8] image_thumb[8]](https://www.cubesys.com.au/wp-content/uploads/2020/05/image_thumb8_thumb-24.png)
![image_thumb[9] image_thumb[9]](https://www.cubesys.com.au/wp-content/uploads/2020/05/image_thumb9_thumb-14.png)
![image_thumb[10] image_thumb[10]](https://www.cubesys.com.au/wp-content/uploads/2020/05/image_thumb10_thumb-12.png)
![image_thumb[12] image_thumb[12]](https://www.cubesys.com.au/wp-content/uploads/2020/05/image_thumb12_thumb-5.png)
![image_thumb[13] image_thumb[13]](https://www.cubesys.com.au/wp-content/uploads/2020/05/image_thumb13_thumb-4.png)
![image_thumb[14] image_thumb[14]](https://www.cubesys.com.au/wp-content/uploads/2020/05/image_thumb14_thumb.png)
![image_thumb[15] image_thumb[15]](https://www.cubesys.com.au/wp-content/uploads/2020/05/image_thumb15_thumb-2.png)
![image_thumb[17] image_thumb[17]](https://www.cubesys.com.au/wp-content/uploads/2020/05/image_thumb17_thumb-2.png)
![image_thumb[18] image_thumb[18]](https://www.cubesys.com.au/wp-content/uploads/2020/05/image_thumb18_thumb-2.png)
![image_thumb[20] image_thumb[20]](https://www.cubesys.com.au/wp-content/uploads/2020/05/image_thumb20_thumb-1.png)
![image_thumb[21] image_thumb[21]](https://www.cubesys.com.au/wp-content/uploads/2020/05/image_thumb21_thumb-4.png)
![image_thumb[22] image_thumb[22]](https://www.cubesys.com.au/wp-content/uploads/2020/05/image_thumb22_thumb-1.png)
![image_thumb[23] image_thumb[23]](https://www.cubesys.com.au/wp-content/uploads/2020/05/image_thumb23_thumb-1.png)
![image_thumb[24] image_thumb[24]](https://www.cubesys.com.au/wp-content/uploads/2020/05/image_thumb24_thumb-1.png)